The Basic Rig
The basic rig is now complete, which means I can now create the deform test and actually skin the low poly mesh to check how everything deforms.
Deform Skeleton
It was such a relief to finally be doing something that felt constructive. My first step was to build the deform skeleton. This is the set of bones that the mesh will be skinned to. It is important to get the bones placed correctly so that joints bend in the right place and the deformations of the mesh are as natural as possible. With the skeleton built, I used comet tools to help get all the bones aligned correctly. This ensures that the axes of rotation are where I want them to be, and therefore the rig will be easier/neater to use.
At this point I also made sure all my bones were named correctly. Every joint name starts with either C_, L_ or R_. This denotes whether the bone is down the centre of the body (C_), on the left hand side (L_) or on the right hand side (R_). This is then followed by the name of the bone, and possibly a number (ie spine01 or trunk03). Finally, every joint ends with _jnt. A good naming convention is essential when rigging as it makes things much easier to find with a search tool etc.
IK Spline Spine
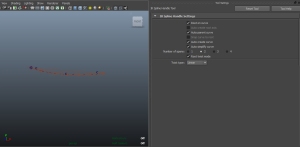
Once everything was named correctly I set to work creating a control system for the spine. I used an IK spline set up. To avoid causing problems and having to rebuild the deform skeleton, I duplicated the spine and placed the IK on the duplicate. I could then parent constrain each individual IK bone to its equivalent on the deform skeleton. This causes the deform skeleton spine to do whatever my IK spine does. I chose to create an IK spline with just two spans. This means the spline has three control points: one at either end and one in the centre. I turned these into three clusters which I could then parent to various controls.
I created a simple cube control for the hips and shoulders of the elephant which I deformed slightly so that they fit the contours of the elephant slightly better. I then parent constrained the corresponding clusters to these controls. I used a simple circle for the middle of the spine and again parent constrained the centre cluster to this control. This provided a way to control the spline curve and so control the bones. However, if a control was moved too far away and the spline curve became too long, the bones did not stretch and so only covered part of the curve.
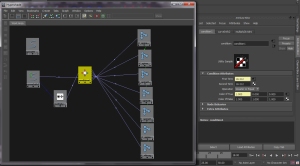
This was an undesirable result, so I set up a fairly simple wiring system in the hypershade. I created a node for the spline curve with a single attribute: the arclength of the curve. This value changed whenever the curve changed, meaning I could always know how long the curve was. Using this changing value, and the curve’s original length, I set up a divide node that would calculate the current length divided by the original length. Then I used a condition node that was connected to the x-scale (length) of all the bones in the spine. If the curve was the same length or shorter then the scale of the bones remained at 1. However if the length of the curve was ever longer than its original length, the scale (length) of the bones was changed from 1 to whatever the divide node calculated. This meant if the controls were ever moved too far apart, the bones would scale and still fill the entire curve.
However, I discovered that while this worked really well when the curve was long, it didn’t work very well if the curve got too short. Some of the bones started flipping to try and remain within the length of the curve. As such I decided to completely remove the condition node and simply wired the divide node straight into the x-scale of the bones. The spine now stretches and contracts brilliantly.
IK leg
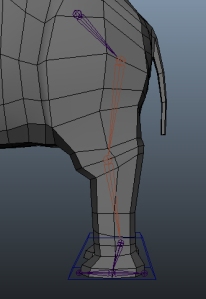
The next step was to create an IK leg set up so that the legs could be easily animated. I debated for a while which two bones to put the IK on before deciding it definitely needed to be shoulder->wrist/hip->ankle. Like the spine, I duplicated the deform bones and applied the IK to the duplicates. I created a foot controller which was, again, a slightly deformed cube. I parented the IK target to this controller and orient constrained the ankle joint. This meant that I could move the controller and the leg would bend, but the foot would remain in whatever orientation the controller was in. Finally I added a controller to move the top of the leg around. I then repeated this for all four legs.
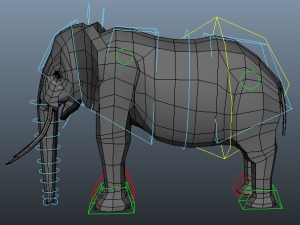
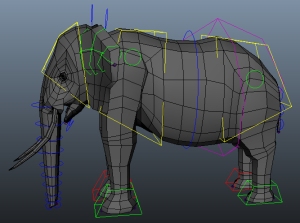
The rest of the body I decided to keep simple for this basic rig and I used simple FK set ups in the neck, head, trunk, ears and tail. With all the controls complete I decided to try and make the rig clearer to use. I started colour coding my controls; green for left, red for right, cyan for anything down the centre. I also made a centre of gravity controller which could move both the hips and shoulders at the same time, in case the animators wanted some FK control from the hips. This I coloured yellow to make it stand out.
However I decided that the cyan was too close in colour to the “selected” colouring that Maya uses. As such I changed things again:

Its good to see people using meaningful variable names. I hate reading code where all the variables are types of monkey…